How to propagate a violet - step by step instructions
Content:
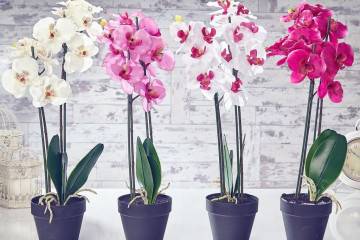
Saintpaulia flower, called violet, pleases with long flowering. More than 50 popular species are known. How to propagate a violet, what parts of the plant are needed for this is useful to learn for novice growers. Vegetative reproduction of violets at home is within the power of everyone.
General information about the plant and methods of propagation
Saintpaulia is called the Uzambara violet after the mountains where these beautiful flowers were found. Plants vary:
- by color scheme;
- the shape of buds;
- border on the petals;
- abundance of flowering;
- coloring of leaves.
To reproduce violets, a special substrate and small pots are required.
Violet is unpretentious, likes diffused lighting without direct sunlight, moderate watering. You can breed a flower from a leaf or part of it, a cutting, a stepson. Each procedure has its own nuances. About how violets usually reproduce at home, it is worth talking in more detail.
Reproduction of violets with a leaf
The fastest way to grow multiple plants at once is to use leaf cuttings. It will take several weeks for the leaves to take root.
There are two methods of foliar breeding:
- rooting the cuttings in water;
- placing the leaf directly into the ground.
Cuttings take root at any time of the year, but the best time for transplants, division is spring. In winter, it is necessary to organize illumination with fluorescent lamps.
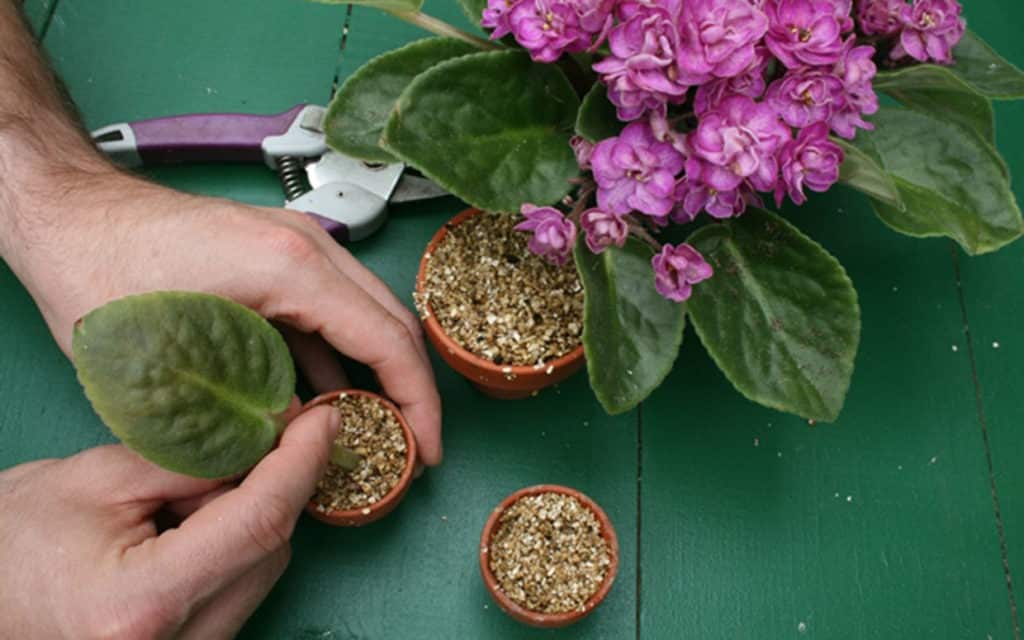
Leaf selection and preparation for germination
When separating a leaf, the age of the flower is taken into account. A leaf from the bottom row is selected from a young bush. In varietal hybrid violets, it is worth choosing planting material from under the peduncle during the flowering period. In an adult Saintpaulia, medium rows are chosen for leaf cuttings.
We need elastic, well-developed leaf plates with a dense shank. With the right choice of planting material, full-fledged offspring are obtained. Long cuttings can be used several times, after the separation of the children, new ones grow at the roots.

A baby is formed at the base of the cutting
Optimal conditions for germination
Water and soil should not cool too much, the cups are placed in plastic bags with fasteners or small greenhouses are made.
Steps: how to propagate violets with leaves
Germination in water:
- Fill a glass with boiled settled water.
- Add some activated crushed carbon for disinfection.
- Set the leaf so that the stalk does not touch the bottom.
- If decay appears, the stalk is cut off again with a sharp blade.
- After the formation of the radicular bundle, the plant is transferred to the substrate.
The procedure for soil propagation of violets with a leaf at home step by step:
- The glass is filled with a mixture of soil for violets with perlite or a mixture of perlite with sphagnum moss.
- They moisturize the soil well.
- Place the seedling in a mini greenhouse.
In 2-3 weeks it grows up to 3 outlets ready for transplantation.
Follow-up care
Learning how to root a violet from a leaf is not enough. It is also necessary to provide the young animals with proper care. After separation from the mother plant, the bushes develop as usual. They need regular watering, in the winter season - additional lighting.
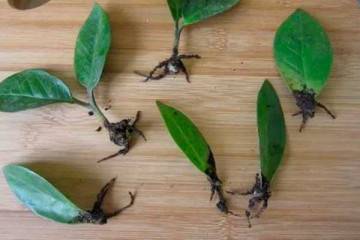
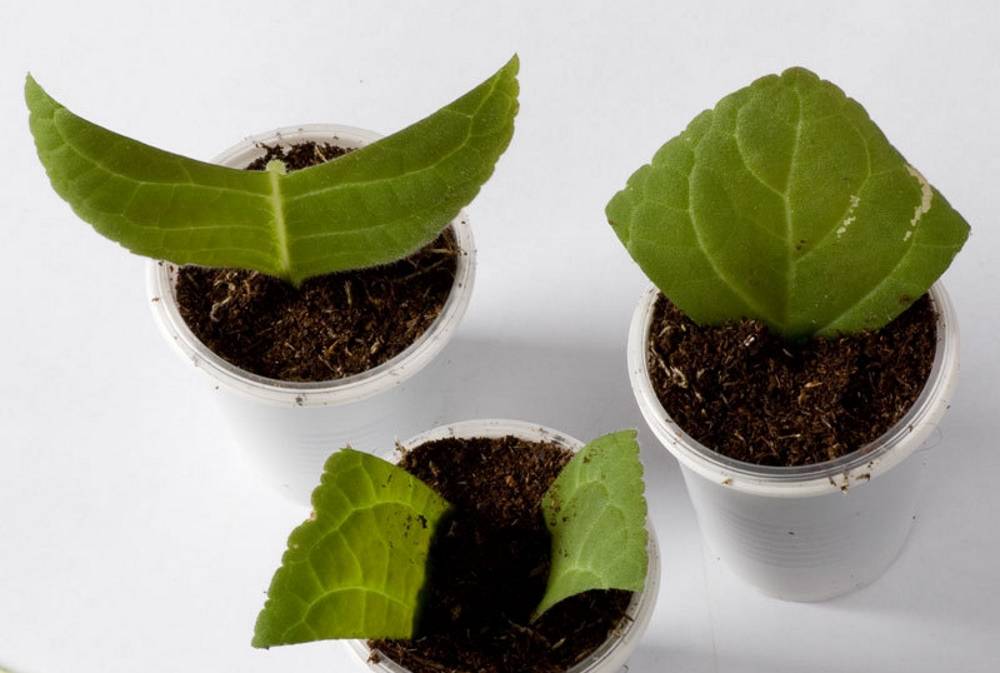
A fragment of a leaf
There is a way how to grow three violets from a leaf. The baby grows out of the embossed seal of the leaf plate - the vein.
Leaf selection and preparation for germination
After separating the planting material, selected according to the rules specified in the previous section, the leaf is divided into 3 parts so that each has a fragment with a thick central vein.
Optimal conditions for germination
Veins on leaves germinate similarly to cuttings. How a violet is rooted from a leaf: create tropical conditions, i.e. high humidity, temperature from +22 to 27 ° С.
Stages of work step by step
How to propagate a violet with a leaf fragment:
- The prepared particles are buried in the soil so that the central vein is recessed by 3-4 mm.
- The soil is well moistened.
- Place the cups in a mini greenhouse.
- Air the leaves daily to prevent mold from developing.
When rooting, the growing violet rosette feeds on chlorophyll. Therefore, it is necessary to ensure the illumination of the leaf.
This is how the planted parts of one large sheet look like.
Follow-up care
Together, a piece of leaf and a young rosette are left for up to six months. Then the bush can be planted separately. Plant care is standard: watering, loosening, temperature control.
Reproduction by stepchildren
The stepson is a sprout that forms in the axils of the leaves or at the stipule of the peduncle. Some varieties are prone to the formation of stepchildren, they constantly grow new rosettes.
They provoke the growth of stepchildren in several ways:
- Root nitrogen fertilization is introduced - nitrogen stimulates the growth of green mass.
- Violets are transferred to wick or hydroponic irrigation, grown in perlite.
- Transplanted into a large pot. As a result, a new growth point is formed on the stem within six months.
- Apply mechanical damage to the top of the rosette: at the violet intended for breeding, pinch the growth point.
What should be a stepson
In most Saintpaulias, the air root comes out only in stepchildren, more than 4 cm. They are separated first. On small-leaved species, varieties with variegated foliage, stepchildren are formed in the lower leaf tier. Separate the layers for rooting when there are at least 3 leaves.
Optimal conditions for germination
For root growth, it is important to maintain a constant temperature regime; cooling the soil below + 22 ° C is not recommended. The humidity is kept constant.

Young stepchildren are visible when the plates of the mother plant are lifted
Stages of work step by step
Stepson Separation Procedure:
- Determine which leaves belong to the young rosette.
- With the left hand, a young sprout is separated, lifting the leaves of the mother bush.
- With a sharp disinfected knife or blade, press on the base of the stepson.
- After the incision, the young rosette remains in the left hand.
- Remove damaged leaves.
- Dip the sprout into a mixture of perlite with sphagnum moss or directly into the soil mixture.
It will take up to 14 days for root formation.
Follow-up care
After rooting, the violet is transferred from the nursery to its permanent habitat. A young plant is looked after in the same way as for age violets.
Peduncle propagation
Peduncles are planting material that fully retains the shape of the buds, the coloring of the mother plant. How do violets propagate from a flowering branch? Choose a blossoming inflorescence or with wilting petals. The stipules should be large. The peduncle is cut, separating the stalk, flowers. It turns out a small fork.
In the trefoil, a baby is often formed, before the rooting of the peduncle, the young rosette is separated, it is better to grow it separately.
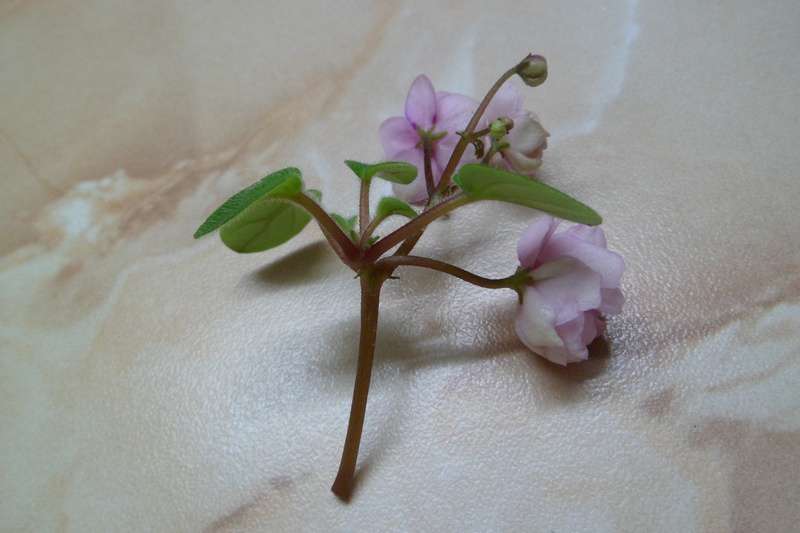
Baby separated from the mother's flower
Features of germination
For rooting of the peduncle, it is better to use the ready-made Greenwall soil mixture. Add 1 part of any baking powder to 2 parts of the soil.
Optimal conditions for germination
The humidity is maintained at 85%, the temperature regime is from 22 to 27 ° C. Mini-greenhouses are made for plants, where it is easy to create tropical conditions. Regular airing, moistening, supplementary lighting is recommended. Full rosettes, ready for planting, appear in 40–45 days.
Stages of work step by step
Basic operations progress:
- Prepare small cups with soil mixture, spill it with a solution of biofungicide and a growth stimulator.
- The peduncles are shortened so that the cutting size is no more than 2 cm, peduncles up to 1 cm.
- Before planting, the sections are dried for 10 minutes.
- Deepen the planting material so that the edges of the stipule are in contact with the surface of the substrate.
Follow-up care
For young violets, wick watering is recommended, a cord is pulled into the pot, which absorbs water from below. With such watering, salinization does not occur in the soil. The rosettes from the peduncles are strong, quickly gaining green mass. Before planting, the root is cleaned of soil, dipped briefly in a growth stimulator.
Growing from seeds
Saintpaulia-chimera gives a full-fledged species offspring only with seed breeding. You need to plant seeds from a ripe, dried seed box.
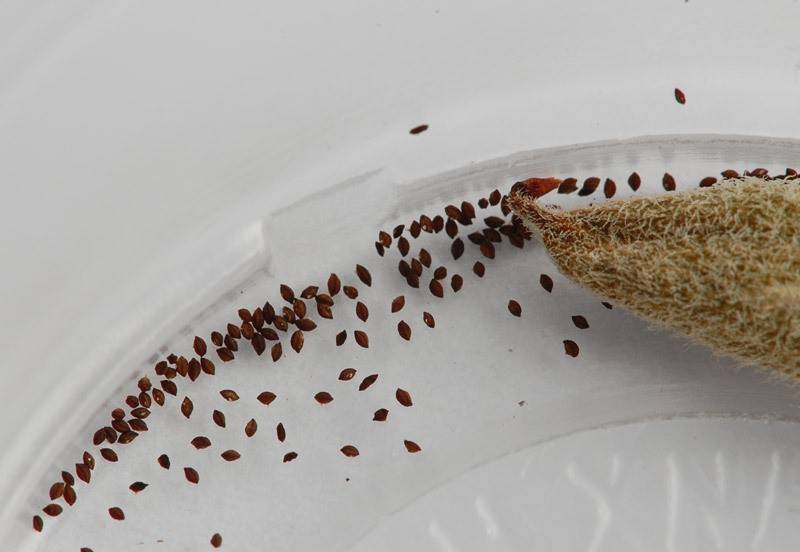
Seeds suitable for growing - the same color and size
How to prepare seeds for planting in soil
Before sowing, dry seeds are mixed with sand to plant evenly. After sowing, the substrate is moistened with a spray bottle.
Optimal conditions for seed germination
The planting container is covered with glass, illuminated with lamps if there is not enough sunlight. Condensation is removed daily in the glass surface, the soil surface is ventilated for up to 4 hours. The soil is moistened without drying out.
Rules for the care of young sprouts
Propagate violets by seeds for a long time. The shoots require constant moisture, there should be enough light. Normally, the sprouts immediately take on color. When the rosettes grow at least 1 cm in diameter, the bush will have 3 full leaves, the plants dive into separate pots.
The choice of materials for planting
For planting material, healthy, adult, abundantly flowering plants are chosen. It is desirable that the socket be symmetrical. If there are spots on the leaves, the trunk of the violet is too curved, the shoots will turn out to be frail, unviable. Planting cuttings or cuttings from 2, 3-year-old bushes gives the best results.
Soil characteristics
It is convenient to use ready-made potting mixes for violets. Saintpaulias develop in slightly acidic, light, loose soil. An independent soil mixture is made from sod, compost soil, rotted peat in a 1: 1: 1 ratio. The soil is acidified, moisture-retaining components are added to the mixture: perlite, sphagmum moss.
Water characteristics
For irrigation, use water that has settled for 3 days. For rooting, it is better to prepare boiled, boil it for at least 5 minutes, then cool. Bottled water is also considered clean, it is advisable to choose spring water.
Capacities
Violets grow in moist soil, but there should be no excess moisture. The capacity is selected with a margin, 1/3 is filled with drainage. Young shoots are planted in common containers, then a separate pot with a diameter of at least 2/3 of the diameter of an adult outlet is purchased for each plant.
Pots are opaque, with large drainage holes. There are special pots for bottom wick irrigation with a water tray. A string through which moisture is absorbed is placed at the root system of the plant.
Common breeding errors
When breeding violets, it is important to avoid mistakes. They will lead to the fact that the plant will not take root and will grow poorly. The most common mistakes newbies make are:
- After planting, young animals begin to feed early. According to the rules, fertilizers are applied no earlier than a month later.
- Winter is not the best time for the separation of plant parts, they grow poorly, there is not enough ultraviolet radiation for photosynthesis. In winter, the daylight hours are increased to the leaves up to 12 hours.
- Cuttings are cut only with a disinfected new blade or sharp knife. When tissues are damaged by hands, rotting of the cutting occurs.
- When propagating with part of the leaf, loose, but not very nutritious soil is needed. The sprout takes everything it needs from the mother's leaflet.
- Do not allow the formation of a large number of roots in the water. When landing, most of them die.
- There should be no less than 3 leaves on the outlet to be planted, this amount is optimal for the formation of the root system.
Knowing how to grow a violet from a leaf at home, you can collect your own collection of violets. It is important to take into account the peculiarities of the plant propagation methods, as well as acquire full-fledged planting material from healthy violets.