Daylilies - planting and care in the open field
Content:
There are such flowers of daylilies, planting and care in the open field for which every gardener is available. A flower bed with daylilies will decorate any site. One cannot help but love them, especially since breeders are breeding all new varieties and varieties of culture, although even an ordinary daylily is worthy of admiration.
Daylily description: varieties and varieties
The daylily flower has been growing in one place for over 20 years, without losing its decorative effect, only becoming thicker and thicker. He feels great in sunny areas, adapts well to partial shade. Also, daylilies in the garden are undemanding to the composition of the soil.
Common daylily
If desired, flower beds can be decorated with daylilies alone. There are so many varieties of this wonderful plant that you can do without repetitions in landscape design.
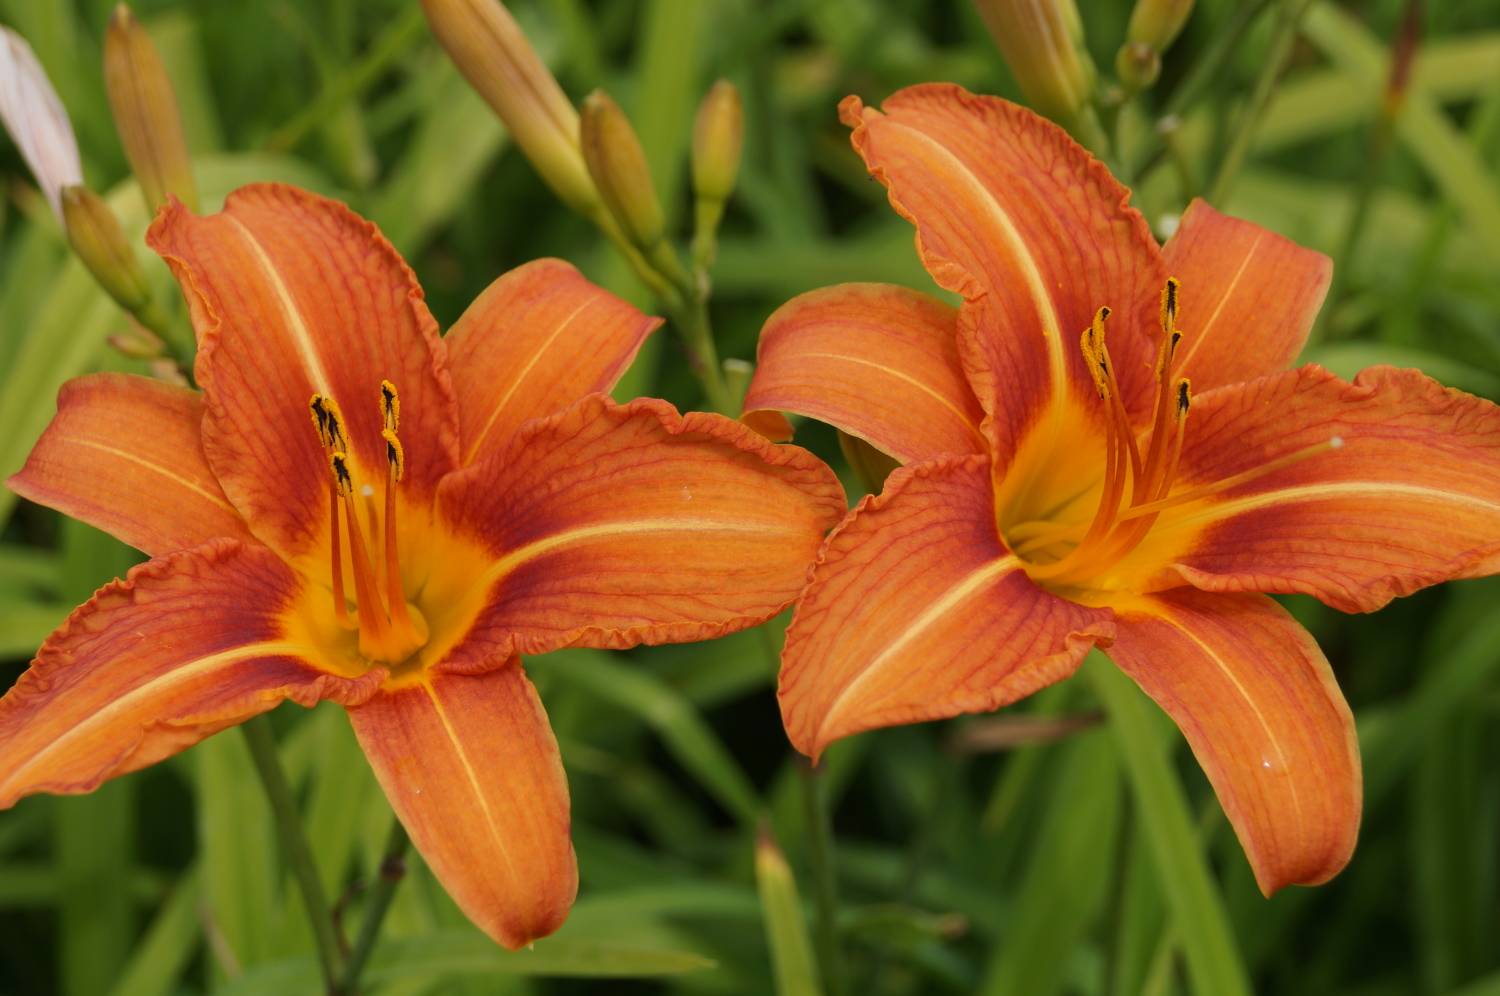
Since the daylily flower looks like a lily flower, hence the name. The structure of the bush differs in that the perennial is formed by single stems ending in an inflorescence of 2-5 flowers. The buds are large, consist of 6 elongated petals with curved tops. An anther is located in the funnel of the two-layer petals. The color of the petals is from yellow, orange to red and their shades. The stem itself is planted with sparse lanceolate leaves.
Basic varieties (for example, ordinary orange daylily) with their elongated buds are more reminiscent of a lily, and new hybrids are already more rounded.
Different types of culture bloom differently. Some open early in the morning, while others in the evening (fall off in the morning). Unfortunately, their age is short. The good news is that instead of the wilted, new ones bloom.
The most widespread among amateurs are hybrid daylilies. They have many species, moreover, zoned for the conditions of Russia (frost-resistant, disease-resistant).
The daylily bush comes into bloom in May and pleases the eye until late autumn. On only one stem, the daylily can release up to ten buds of various colors.
Culture has monochrome views:
- yellow-brown daylily (Hemerocallis fulva) blooms only with red-orange flowers. But their number reaches up to 12 pieces. on the stem. The buds themselves are dense, almost closed. The shoot is densely planted with leaves;
- daylily yellow (Hemerocallis flava) has more compact forms. The color of the buds is yellow. In appearance, they are most similar to lily flowers. The shoot, densely planted with dense leaves, ends with a single bud. The aroma is pleasant, not strong.
Of the undersized varieties, they note:
- Stella de Oro. Blooms for two summer months. On a short (up to 40 cm) stem, bright yellow buds bloom;
- Little Paul. Differs in the color of the middle of the flower, which is darker;
- Pixie Parasol stands out with its apricot-colored petals. The buds themselves are thin and delicate.
Planting site and soil
Planting and caring for daylilies is elementary. They can grow well in almost any soil, anywhere.But still, when choosing a site, you should pay attention to:
- occurrence of groundwater;
- the neighborhood of shrubs and trees;
- availability of lighting.
Daylily can grow in the shade
A sunny, well-drained area is ideal, especially for light-colored varieties. For the dark, partial shade is suitable, but subject to illumination of at least 6 hours a day.
For planting, it is advisable to select an area with fertile soil, although further special dressings will not be required.
The culture does not need transplants, if only for the purpose of reproduction or thinning of the curtain. The maximum flowering is observed in the first 7 years. Further, the number of flowers decreases, and the buds become smaller.
When and how to plant
Novice gardeners are interested in how and when to plant a daylily. You can plant, transplant a crop during the entire growing season. An unpretentious plant will almost certainly take root and sprout. The exception is non-frost-resistant hybrids. Spring planting is more suitable for them.

Daylily sapling
For any varieties, it is advisable to carry out the procedure after the final retreat of return frosts. The advantage of planting in spring is that the young plant will painlessly root and bloom in the current season. With a late autumn transplant, there is a risk that the seedlings will not root properly and will enter the season weak. It is unlikely that such a flower will bloom soon.
Planting material is:
- purchased;
- obtained from their own plants.
Preparatory work needs to be done with any material:
- Cut the leaves in half or a third (yellowed, dried leaves do not affect the health of the seedling).
- Cut out the damaged parts of the stolons.
- Treat the slices with crushed charcoal or cinnamon powder.
- Before planting, keep in water for 1-4 hours. It is recommended to add a growth stimulator (root or epin).

Daylily sapling with rhizome
First of all, you need to choose a place for the flower garden. It is best if it is in a sunny, dry area, protected from strong winds.
Daylilies prefer loose soil with neutral or slightly acidic pH.
The soil is dug onto a shovel bayonet, cleared of debris, weed roots. If necessary, it is enriched with organic matter (humus, decayed foliage).
Depending on the size of the rhizome, a hole is prepared, loose soil is poured onto its bottom. Further, a stolon with roots is laid out on top, covered with soil.
Planting ends with moderate soil compaction in the root zone, watering. To preserve moisture, it is recommended to sprinkle a young seedling with mulch (straw, peat, humus, sand, rotted foliage).
Watering and loosening the soil
Daylily care is mainly about watering. The quality of flowering depends on it. The older the plant, the more water is required with each watering. In the heat, abundant soil saturation is needed to the depth of the rhizomes, that is, by 25-35 cm. At the same time, overgrown, old stolons can go without water for a longer time. Rather, the roots on it are capable of extracting the necessary moisture from a great depth.
Watering is best done early in the morning or late in the evening. In order to avoid burns or decay of foliage, it is recommended to pour water at the root (or organize very shallow sprinkling). Warm water is needed.
The lack of moisture can be understood by the discoloration of the leaves, which fade.
The culture does not need loosening. This procedure is even dangerous for her, because the root system is located almost on the surface. There is a great risk of damaging the loose, juicy stolon and causing infection. Hand weeding is enough.
Reproduction methods
There are three methods for breeding perennials at home. Each of them is good in its own way. Daylily can be grown:
- from seeds;
- children (proliferation);
- dividing stolons.
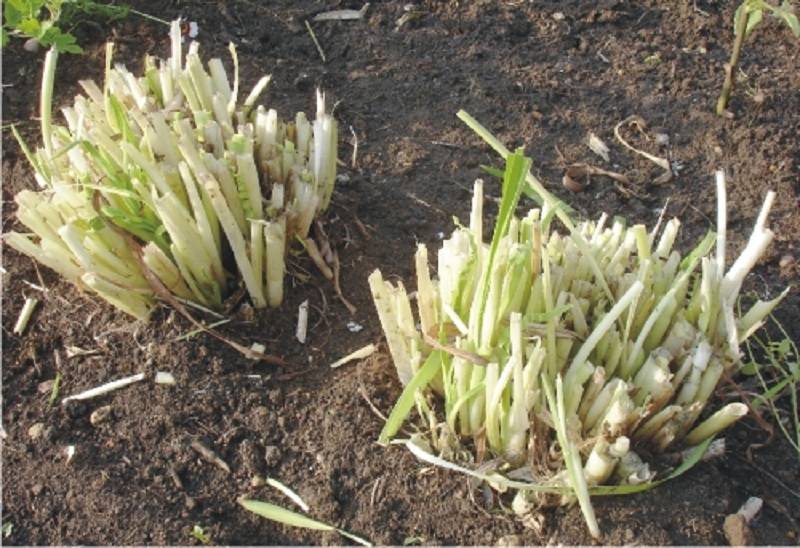
The most commonly used method is the latter. A sapling is a piece of rhizome with stems. To obtain planting material, a piece of rhizome is cut down from a common root. From an overgrown rhizome, it is more convenient to do this with a sharp bayonet shovel. The division of the cut piece into components is done manually. As a result, each seedling should have a rhizome with a stem. After trimming the stem, the seedling is ready for planting in a new location.
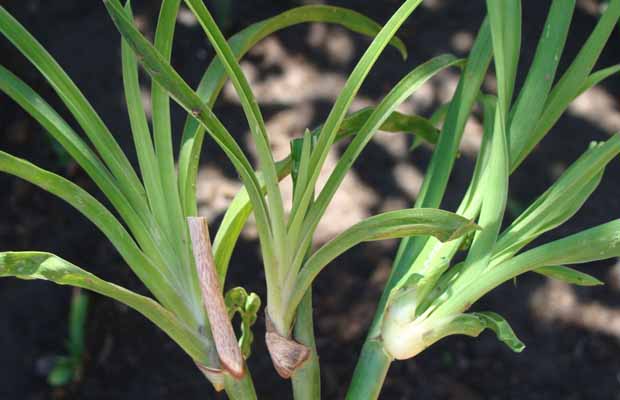
Daylily babies
Many are interested in the question of how to plant daylily babies?
Daylily babies are leaf rosettes with root embryos that grow on the shoot. For reproduction, a piece of the stem with a rosette is cut out, placed in water to form roots. It is advisable to add a growth stimulator (Epin, Kornevin) to the water.
In the future, the seedling is grown in an individual container and transplanted to a permanent place no later than September.
Growing from seeds is a rather troublesome task, but it is also often used. It begins with self-pollination of flowers with a brush. Usually the percentage of pollination is very low. Not all seeds mature and can reproduce in the future. If you manage to collect high-quality planting material, then you can hope to get seedlings from them. The material is not subjected to stratification, it is simply dried at room temperature.
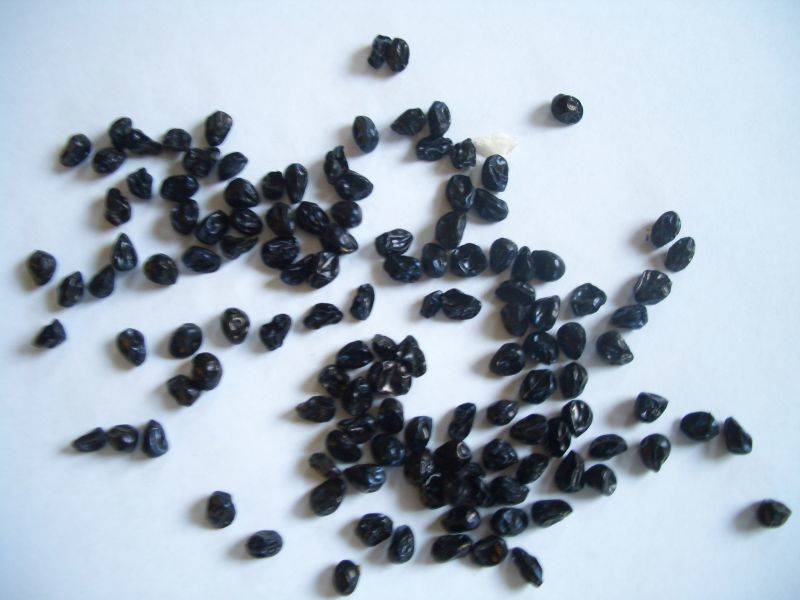
Daylily seeds
Before sowing, it is required:
- Soak the seeds for a day in warm, settled water.
- Treat them for a quarter of an hour in a disinfectant (potassium permanganate, hydrogen peroxide).
- Rinse with boiled water.
- Sow in peat soil (with the addition of sand).
Grown seedlings should be dived into individual pots. Good seedlings will grow with the right maintenance, namely:
- regular watering;
- providing a sunny warm place;
- top dressing;
- protection from pests and diseases.
Top dressing and transplanting
There is no need to feed and replant daylilies. Fertilization advice is purely advisory in nature. For this, complex fertilizers for flowering plants can be used. Better yet, use compost. Fertilizing is desirable in early spring and before winter.
A transplant is needed only to thin the plantings, and then only if necessary. The procedure is best done after the plants have faded (in August - September).
Daylily pruning
Daylilies are herbaceous plants. Their development continues during the cold period. There are different opinions about the need to trim the aerial part of the plant.
Leaves die with the onset of frost. In order to avoid the appearance of fungal infections from rotting foliage, reproduction of slugs, snails under a grass cover, it is advisable to cut them off and dispose of them. In addition, a cover of dead leaves makes it difficult for oxygen to reach the root system.
Daylily pruning
The procedure is carried out with a sharp pruner. The height of the remaining stem should be no more than 10-15 cm from the ground.
Pests and diseases
Caring for daylilies in the garden includes protection from pests and diseases. Most often, the culture is affected:
- wet rot.It is caused by bacteria of the genus Erwinia. The disease begins with rotting of the leaf petiole. This gives off the smell of rotten onions. High humidity and heat lead to the rapid spread of the disease. It is better to prevent than to cure. The situation can be saved by soaking a new bush in bleach and planting in a quarantine bed. An already growing bush in most cases dies and must be destroyed. It is not recommended to plant a crop on this site for 2-3 years;
- rusty leaf spot. Appears when the temperature changes frequently. It appears as brown spots on the leaves. It can be fought with such agents as Biosept, Biochicol, fungicides from the triazole group.

What does rust look like?
Of the pests, they note:
- aphids;
- spider mite;
- thrips;
- snails, beetles and ants.
To combat them, acaricides or insectoacaricides of a wide spectrum of action are used, for example, actellik, decis, zolon. Sometimes the use of insects such as ladybugs or yellow glue flower traps helps.
How to prepare for wintering
As soon as the plants have faded, preparatory work can begin before winter. Mainly:
- pruning wilted flower stalks so that they do not pull forces for seed ripening;
- reproduction by division and transplantation;
- the introduction of potassium-phosphorus dressings;
- removal of the aerial part (pruning at a height of 10-15 cm from the ground surface);
- providing shelter if necessary (mulch, straw, spruce branches, etc.).
What is the purpose of removing the aerial part of the bush? This is necessary in order to:
- rotting foliage did not provoke disease and rotting of the root system;
- ensure the removal of possible pests and their larvae.
Pruning should be carried out at constant subzero temperatures. Maybe a little earlier or a little later. Pruning too early, however, can provoke the roots to germinate new shoots.
The pruning procedure consists of several stages:
- All stems are cut with sharp garden shears, retreating 10-15 cm from the surface.
- The cut grass is raked up and disposed of (it is possible in a compost pit in the absence of pests).
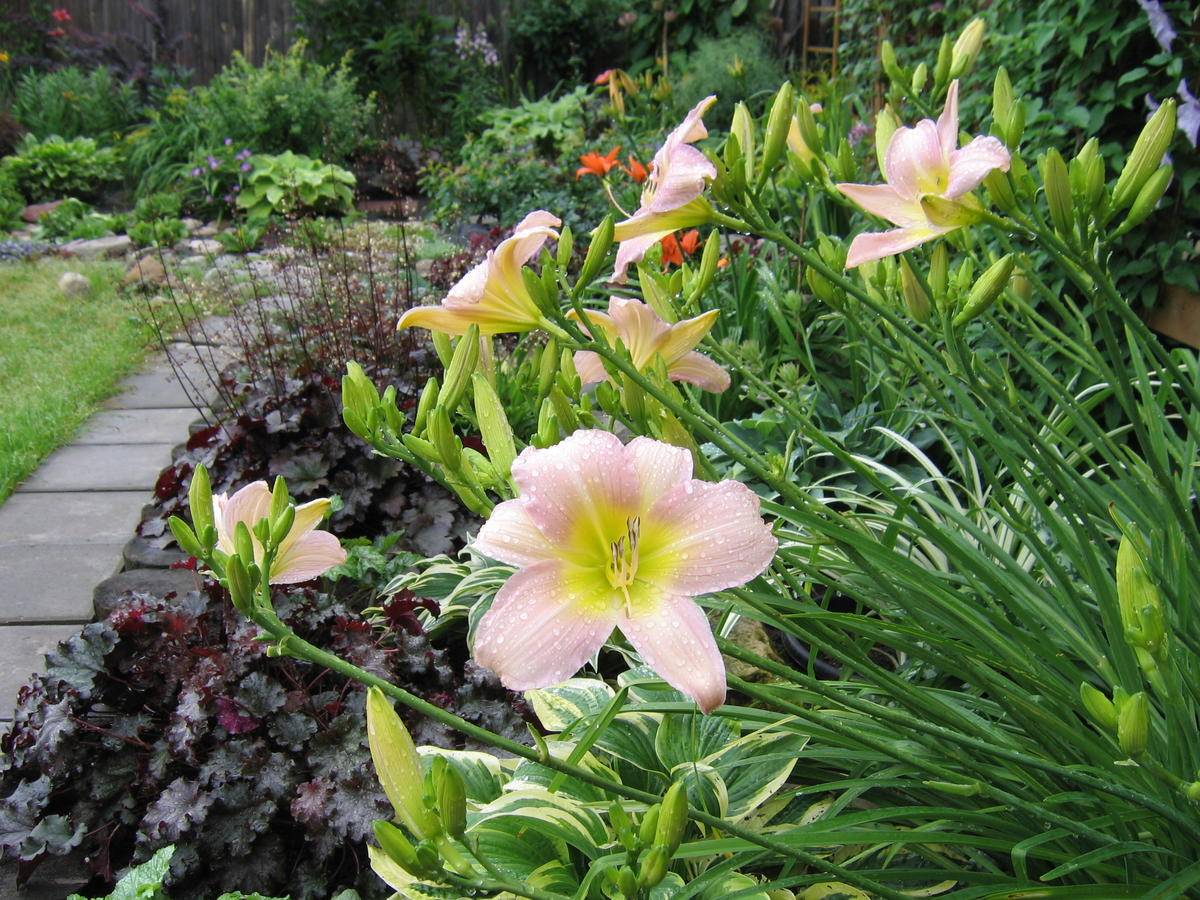
Flowering period and careafter
Daylilies are distinguished by long flowering, which is about two months in the middle of summer. Some buds are constantly replacing others, since the flower does not last long. To preserve the decorative effect, wilted buds need to be removed regularly. The same applies to dried foliage and damaged shoots.
Different varieties of daylily
So that the flowering is plentiful, and the buds are large, starting from the second year, it is advisable to feed the plants. The culture is hygrophilous. It is recommended to water the flowering plants frequently and abundantly in the morning and evening.
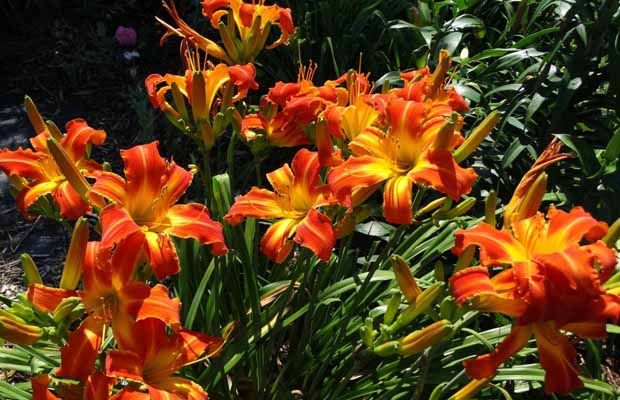
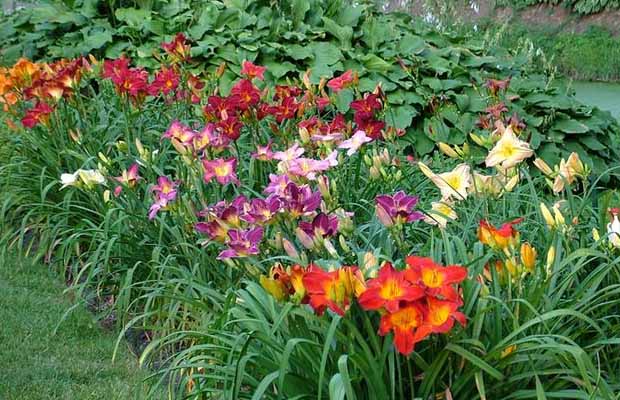
Use in landscape design
Perhaps this is one of the crops that looks good in both single and group plantings. A flower garden of several types of daylilies can make a fancy carpet against a backdrop of green grass, especially if they are ranked by height and grouped by shade. Planting of different crops (also by the height of the bush) with buds of the same color can be originally combined.
Daylily in landscape design
However, many gardeners prefer to combine other flowers with daylilies. The culture successfully complements and replaces early flowering bulbous crops, for example, crocuses, tulips bloom in early spring, and daylilies are just starting to bloom.
When using the daylily in landscape design, you need to be careful with the neighbors of the irises. They are not inferior to each other in beauty and bloom at the same time. This combination can diminish the charm of each of the cultures.
Daylilies are beautiful flowers. They grow well in new areas. They amaze with a variety of colors, shapes and sizes of buds. You can plant it once and admire their beauty for many years. Since it is easy to care for daylilies, everyone can do it.