Phlox: planting and care in the open field
Content:
Phlox belongs to the family of herbaceous plants Sinyukhovye. More than 80 types of phlox have been studied. In cultural cultivation, about 40 were obtained. The homeland of these perennial and annual dwarf shrubs is the north of the American continent. Siberian phlox grows in the natural environment of Russia. This species is creeping and grows only in Siberia.
Description of the flower
The cultivation of phlox in Europe began in the 18th century. Due to the red color of flowers, wild tall bushes, the Greek breeders gave the plant the name φλόξ, which means "flame".
Variety of phlox
Plants are:
- annuals;
- perennial;
- upright;
- creeping.
The leaves on the stem are lanceolate and opposite.
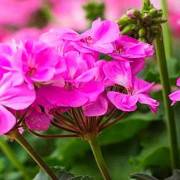
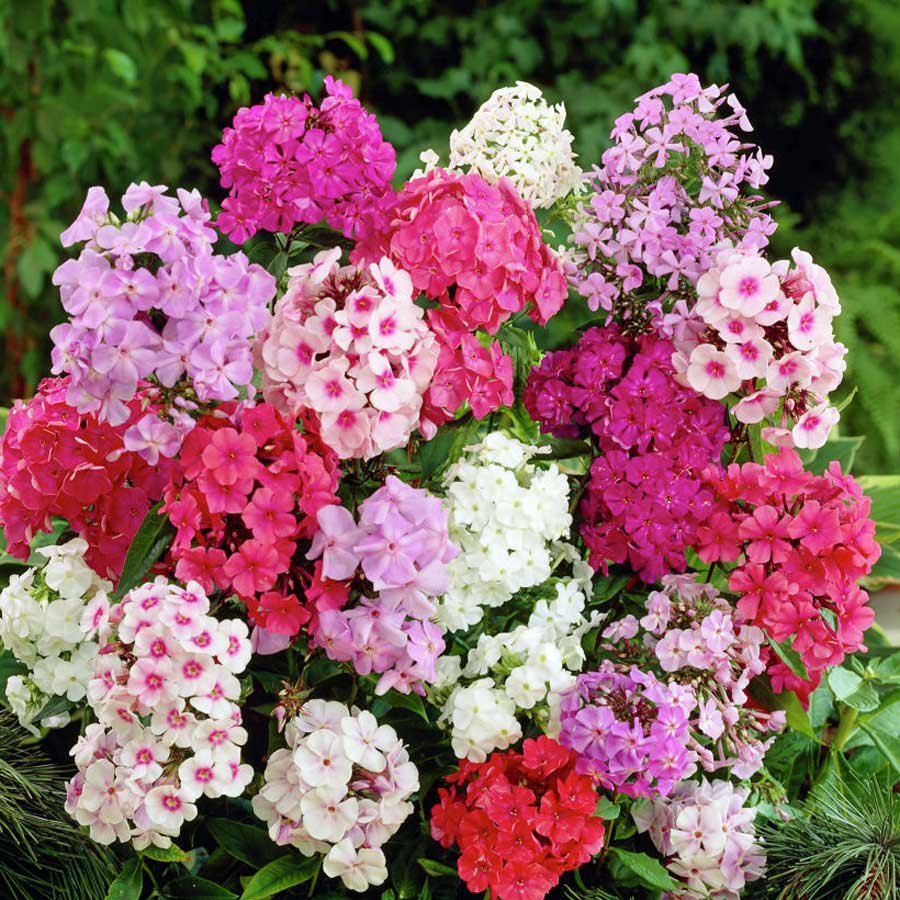
Small tubular flowers are collected in inflorescences, in which there can be about 90 of them. The buds themselves are five-petal, small (no more than 4 cm in diameter), very odorous. The petals can form corollas in the form of a wheel, an asterisk, be notched, dissected. The colors of the inflorescences are very different, including interspersed with other shades in the main background.
The inflorescence crowns the very top of the shoot.

Phlox seeds
Phlox fruit is an egg-shaped capsule. The seeds are very small. 1 g can be from 70 pcs. (perennials) up to 550 pcs. (annuals) seeds.
Reproduction of phlox
A huge number of species and varieties of plants speaks of its relevance for decorating garden and house plots. Their distribution is also due to rather simple reproduction. Almost all parts of the parent bush are suitable for obtaining a new plant.
The most common methods are described below.
Breeding by sowing seeds
This method is quite successful in terms of obtaining viable plants. Only the traits of the variety are lost. The buds can be of any color and with any shape of petals and baskets. Because of this, the cultivation of a crop with seeds is more practiced by breeders.
This method has its own characteristics:
- before sowing, the seed pod is kept intact (this contributes to better germination);
- sowing seed should be done before winter (until spring, the seeds become old, not germinating).
You need to select dense, dark seeds and sow them directly into the garden. At low temperatures, the seeds will naturally harden (undergo stratification) and sprout in early spring. Such seedlings will be resistant to slight recurrent frosts.
Already in mid-April or early May, with 2-3 pairs of leaves, the plants are transplanted to a permanent place. The distance between the bushes should be at least 10 cm.
Division of rhizome (bush)
This method is used more often than others. The least injury to the bush will cause its division before or after the growing season. This is early spring or early autumn. The plant must have time for firm rooting.
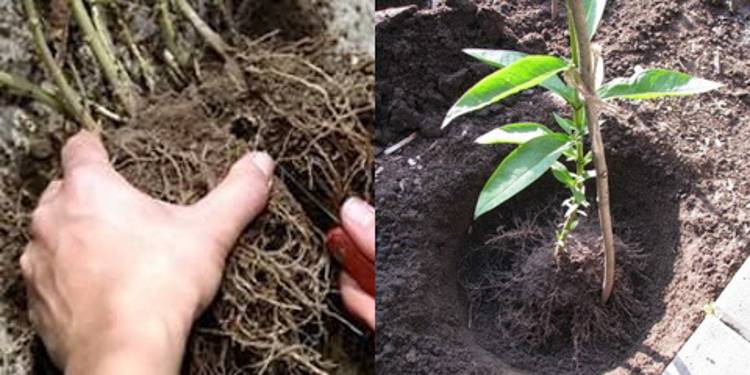
Dividing the bush
If there is an urgency in carrying out the procedure in the summer, then the transplant with division should be carried out in cloudy weather.Only a large adult bush is divided (not earlier than 5 years of age). Each division must have a sufficient number of roots. You should not shake off a clod of earth from them. In the future, the bushes need abundant watering.
The sequence of actions when dividing a bush:
- A bush is being dug up.
- Root collars are cleaned from the ground.
- The roots and stem are separated from each other.
The last point is less traumatic to do with your hands, but an old large bush can be cut with a knife or a shovel.
Each division should have the rudiments of future stems or eyes and a sufficient number of roots.
To avoid overdrying the roots, new bushes should be planted immediately. If this is not possible, the roots of the delenok must be placed in a humid environment (dipped in clay slurry, sprinkled with wet sawdust, soil, etc.).
This method is good because the parent bush will almost certainly recover and bloom well in the current season. Next spring, it will be possible to separate a part from it again, only on the other side of the bush.
Cuttings
This method has its own characteristics.

Cutting with heel
- In early spring, you can break out a shoot with a heel and germinate it in a greenhouse. In no case should you break out all the shoots. The loss of half of the shoots will lead to the death of the parent bush. Better to stop at 30-40%.
- In May - June, cuttings of green shoots can be carried out. Each healthy stem is cut into cuttings with 2 knots. The lower cut is directly under the peephole, the upper cut is one finger above the knot. Before planting, the lower leaves are torn off, and the upper ones are cut in half. The material can be planted directly in open beds or in seedling boxes. To retain moisture, sand should be sprinkled on top of the soil. The cuttings go deep into the ground up to the upper eye. The soil around is compacted. The distance between the cuttings should be 4-5 cm, and in the aisle - 10 cm.
- Summer cuttings are carried out from July to August. For this, the upper part of the stem is cut off (4-6 eyes and 2/3 of the length) and planted in a shaded, ventilated greenhouse.
- Autumn cuttings. Cutting of planting material is carried out in the second half of September. Cuttings (also the upper 2/3 of the stem) are planted at an angle of 35-45 ° directly into the garden bed, well covered with humus, rotted foliage or peat.
Propagation by leaf cuttings
An interesting and good way to propagate phlox is by cuttings with leaves. This method can only be used until mid-July. To do this, a healthy leaf with a bud in the bosom and a small piece of a branch is cut from an adult shoot. Further, the material is planted at an angle into a box with nutrient soil. The axillary bud with a piece of the shoot deepens into the ground, and the leaf remains above the ground. From above, the soil is covered with sand (layer up to 1.5 cm).
Further growing is carried out in greenhouse conditions at a temperature of 18-20 ° C and constant moisture in the upper soil layer. Air circulation and shading from direct sunlight are shown.

Cutting by leaves
After 25-30 days, the seedlings take root. Starting with 3-4 pairs of leaves, you can begin to form a bush, that is, pinch the tops of the stems.
Propagation by root cuttings
Sometimes it becomes necessary to get rid of phlox stems affected by diseases. This plant often suffers from stem nematodes. This can be achieved by using the roots of a diseased flower as a planting material. The process is laborious and rarely used.
Root division can only be done in late autumn or very early spring (first half of April). Thick juicy roots are suitable for division. For planting, pieces of 6-7 cm are cut. Root pieces are planted in seedling boxes with the thin end down. Landings from above are covered with a thick layer of sand (about 5 cm).
At the end of winter, the box is taken out into a warm, bright room. Just do not allow direct sunlight. As the sprouts hatch, the young plant needs to be taught to light. It will be possible to land on a permanent place with the onset of warmth.
In spring breeding with roots, seedling boxes are kept at a temperature of 10-15 ° C for a couple of weeks. Then it is gradually increased, with the appearance of sprouts, the seedling is planted in a permanent place.
Reproduction by layering
The easiest way to breed phlox is with layering or leftovers. To get a full-fledged plant with layering, you just need to cover the bush with 40-50 cm of fertile soil and water it regularly. After a certain time, roots appear on the stems under the bulk soil. When they become strong, the stem with the new root system must be carefully cut and planted in a new place.
A very simple method is to leave the lower part of the roots in the ground, that is, when digging up the parent bush, its roots are not completely dug up. New shoots will appear from the hole covered with fertile soil next spring.
Phlox: planting and care in the open field
Since phlox are planted to decorate gardens and, as a rule, in the most prominent places. Although the culture is considered moisture-loving, lowlands should be avoided when planting. Sunny areas with deep groundwater are best suited.
Soil for planting
Phloxes prefer light, fertile soil. Neutral acidic or slightly acidic loams are ideal for them.
Illumination
The abundance of flowers and the splendor of the bush are distinguished by bushes growing in sunny areas. At the same time, a light lace shadow will not hurt at all, especially on a sultry afternoon.
Temperature regime
The plant withstands heat well, easily tolerates a drop in temperature. The exception is young bushes. It is desirable to shade them.
Humidity requirements
This plant is moisture-loving. But he does not like stagnant moisture. Therefore, moderate watering is required.
Landing rules
Bushes are planted in pits prepared in advance. The size of the holes depends on the size of the seedling. In any case, the distance between plants must be at least 50 cm. The seedling is planted vertically. In this case, the roots should be well spread. Then the soil around the plant is compacted and watered. To retain moisture, the area around the bush is mulched.
Culture care
It is very easy to care for phlox. The main thing is to initially choose the right place. In the future, you will need to regularly water, loosen and feed the plant.
If the bush is tall, then a garter may be required. To avoid contamination of flowers, you should provide air ventilation in the flower garden.
Feeding mode
Organic and mineral fertilizers contribute to the formation of a rich crown and lush flowering. The size of buds, inflorescences and the duration of flowering also depend on this.
Spring feeding is desirable with organic matter (manure infusion at the rate of 40 g per bucket of water). Good results are obtained by infusion of ash (a liter can per bucket to insist for a day), a solution of ammonium nitrate (20 g per bucket of water).
With the second fertilization, the addition of potassium and phosphorus salts to organic matter is encouraged. In the middle of summer, you can only do with organic matter. The last two times you need to add potassium and phosphorus.Top dressing is carried out strictly after watering.
Loosening and mulching
You need to loosen the soil immediately after watering. A thick layer of mulch will help retain moisture. It will also make it harder for the weeds to break through. Humus, peat, dry foliage, sawdust are suitable as mulch.
Bush formation
Pruning is carried out in order to:
- rejuvenation of the bush;
- shaping;
- increasing tillering.
The main pruning is autumn. In this case, the bush is cut almost to the root. It is necessary to leave no more than 5 cm of the above-ground part of the stems.
Watering mode
When watering, pour water at the very root. Drops on the leaves can cause sunburn. In the heat, watering is carried out in the morning and evening.
Preparing for winter
The danger of freezing threatens only young plants. For the winter, it is worth sprinkling them with rotted foliage or spruce branches.
Phlox transplant terms
Planting and transplanting bushes are carried out:
- in spring - May, June;
- in autumn, no later than September.
In case of urgent need, it is possible in the summer.
Diseases and pests
Pests affecting phlox:
- cruciferous flea;
- ordinary earwig;
- slugs.
With them, the tops of the stems dry up and twist. It is better to dig up the plant and burn, process the site with lime. Soak the rhizomes for a couple of hours in a pale pink solution of manganese and use for reproduction.
Caterpillars and snails must be harvested by hand. With multiple lesions, insecticide treatment will be required.
Phlox diseases:
- powdery mildew;
- spotting;
- phomosis;
- verticillosis.
For these diseases (except for verticillosis), copper-containing drugs such as oxychoma and HOM will help.
With verticillosis, complete destruction of the plant and liming of the site are shown. This is a dangerous fungal disease. It causes discoloration and wilting of the bush. To prevent infection with this disease, young seedlings must be treated with a special liquid (maxim, gamavit) before planting.
Like any other garden plants, phloxes need to be taken care of. With proper care, they will delight with their flowering and aroma all summer long.