When to dig out hazel grouses after flowering and how to store before planting
Content:
The imperial hazel grouse is a very interesting plant, but not everyone can grow it. In the article below, there are some simple tips on when to dig the imperial hazel grouse after flowering and whether it is necessary to do it annually, as well as the pros and cons of annual digging.
Description of the flower
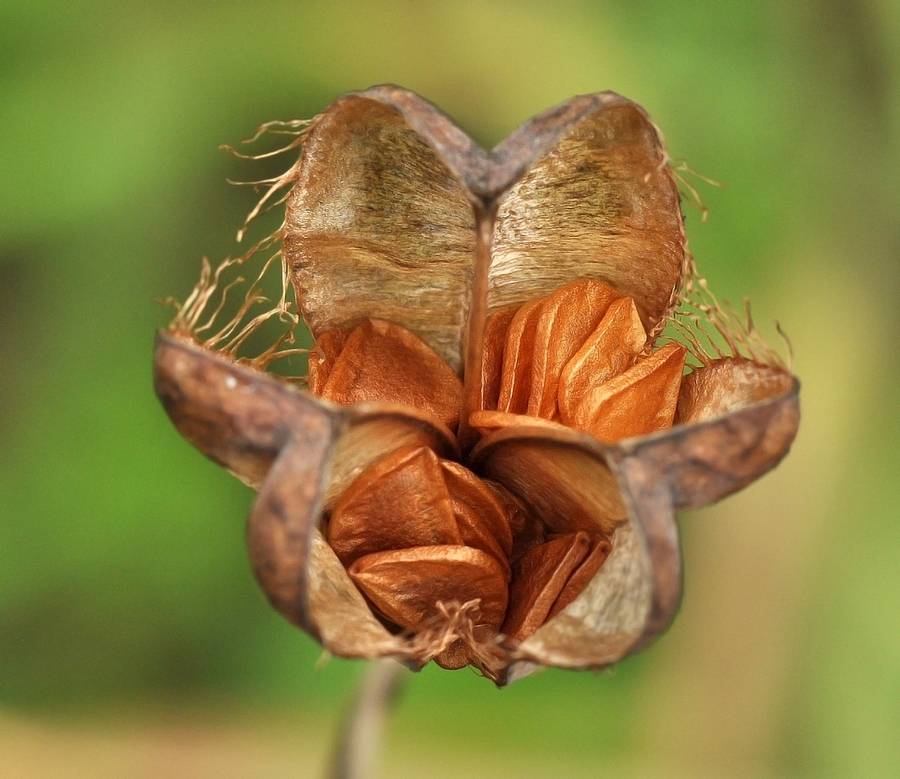
Grouse imperial, or royal (botanical name - fritillaria) is a very unusual perennial exotic plant of the Liliaceae family. In appearance, it resembles the ritual hat of an Indian chief, worn on a high pole, or a miniature tree of paradise. Large bells in the amount of 5-7 pieces hang in clusters from under the thick cap of green feathers. yellow, orange, and sometimes fiery red.
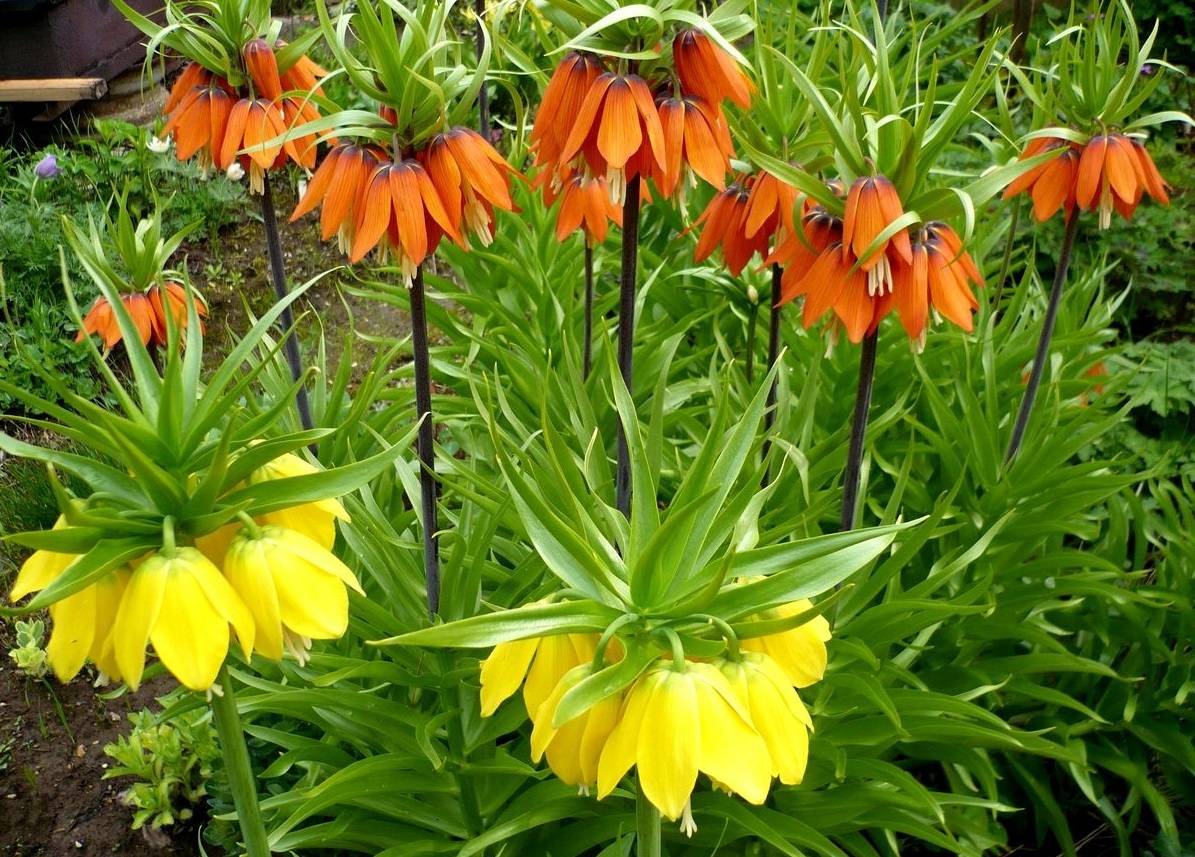
Grouse imperial - a beautiful, but difficult to grow flower
In height, the peduncle often reaches more than 1 m, and the bulbs of some varieties, including the royal hazel grouse, can weigh up to 1 kg. It blooms after the winter cold one of the first, from April to May. When the nature around looks still quite gray and dull, this handsome man begins to delight with his fiery, like tongues of flame, flowers.
But now summer is coming, hazel grouses have faded, what to do next with them?
Grouse is a bulbous plant, a close relative of daffodils, tulips and lilies. And many gardeners have a question, when should they dig up hazel grouses after flowering? Should this be done at all, and if necessary, how often? Annually, or much less often?
Do I need to dig imperial hazel grouse every year
This question is still quite controversial, and amateur flower growers with unquenchable activity probably ask their friend - Google: “Hazel grouse: when to dig it out?”. Some admirers of this specimen consider its annual excavation extremely necessary, others that once every two or three years is quite enough. Each grower will decide this for himself. Both methods have their pros and cons.
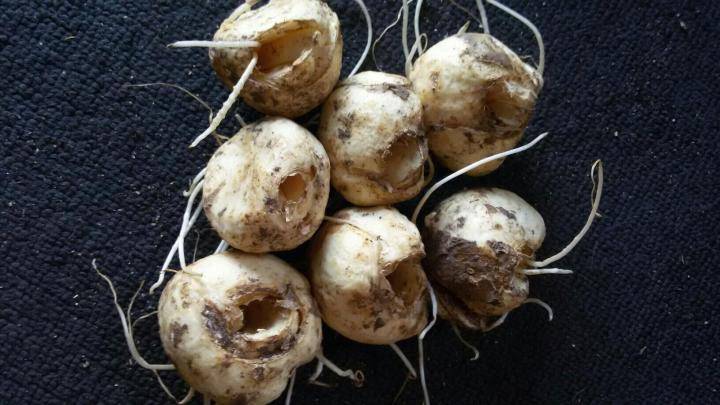
Imperial hazel grouse seeds
Pros of annual digging:
- digging prevents the development of diseases that can develop in the bulbs during the dormant period, especially large specimens are susceptible to them (to which the imperial hazel grouse belongs precisely);
- prevention of pest attacks, since during the period of sleep the plants cannot resist them;
- each adult bulb forms one or more replacement bulbs, that is, by digging them out, you can increase the amount of planting material for the next year. A good option for small businesses. If the hazel grouse is propagated by seeds, then the first flowers can be expected up to 8 years. This breeding option is suitable exclusively for growing a flower on an industrial scale;
- if the bulbs are left in the ground without annual digging, they will become smaller, which will negatively affect the flowering process in each subsequent season;
- the bulbs are large enough and, in addition, grow rapidly, as a result, their feeding area decreases. Due to the lack of trace elements for the next year, the plant may be frail and bloom poorly or will not bloom at all.
An adult bulb forms not only replacement, but also small children, which, when dug up, are very easily damaged, often break off from the mother, are lost in the soil and may not germinate the next year without growing. From this point of view, it is better to dig out hazel grouse bulbs every two years, when the children grow up and gain strength.
So, having weighed all the pros and cons, everyone decides for himself when to dig the hazel grouse after flowering, and what to do next when the hazel grouse has already faded.
When to dig out hazel grouses after flowering
The imperial hazel grouse belongs to primroses and blooms from April to May. The flowering time lasts about 2-3 weeks and depends on the climate of the growing region. May bloom a little longer in cooler weather. The farther south the area is, the earlier it will bloom. So when to dig up the bulbs of the imperial hazel grouse? It is necessary to dig out the bulbs of the hazel grouse flower at the moment when they are at rest. How to determine that this period has already arrived? This can be done according to the following criteria:
- the flowering period is over and the petals have fallen;
- the green parts of the plant began to turn yellow. If this has not happened yet, it is too early to dig, this means that the hibernation period has not yet begun;
- to determine the onset of a dormant period, you can also slightly dig in the soil near the plant and check the condition of the roots. If they have already begun to dry up, then the time has come.
The digging period can vary over 2 months: June and July. Usually, by mid-July, all bulbs should already be dug up and stored or replanted.
Correct digging of hazel grouses after flowering
When the hazel grouse has already faded, here's what to do next. The bulbs of this plant are very fragile, therefore, during the process of extracting them from the soil for maximum safety of the planting material, certain rules and precautions should be followed:
- you need to dig out hazel grouses when there is no rain;
- it is necessary to trim the hazel grouses after flowering when the seed pods have not yet formed, otherwise all the power will go into them, and not into the bulbs. You need to leave a trim of the stem about 10 cm;
- hazel grouse bulbs can be easily damaged when excavated. To prevent this from happening, it is necessary to retreat from the stem by about 20-25 cm;
- carefully, slightly digging, pull the bulbs out of the soil by the stem of the plant. Gently remove soil;
- if the bulb is accidentally damaged, for example, cut with a shovel, this is not scary, it will not die, it can also be stored by treating the damaged area with an iodine solution;
- you need to remove the top rotten shell and inspect the bulbs. If traces of rot or any fungal diseases are found, this place must be cut with a knife so that there are no affected areas left, and burned with iodine or brilliant green so that it does not spread further;
- the dug out bulbs should be put to dry together with the stems and roots. For this purpose, it is worth choosing a warm, well-ventilated place, but so that direct sunlight does not fall;
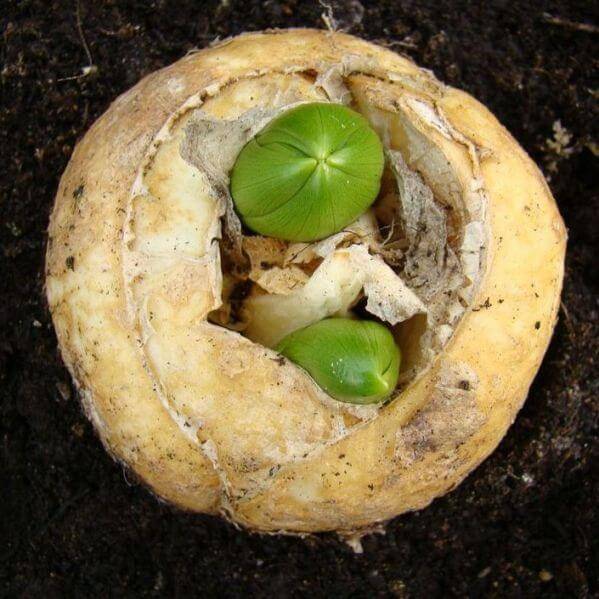
- after about a week, when the roots and stems are completely dry, you need to carefully separate them from the bulbs. With proper separation of the dry stem, a through or funnel-shaped hole should form in the bulbs.Through - subsequently it will protect the plant from excess moisture, but if a blind funnel-shaped hole has formed, then during planting it will be necessary to lay the bulbs a little to one side so that water does not accumulate inside and decay does not occur.
Hole in the bulbs is normal
The bulbs can now be stored.
Where and how to store hazel grouse bulbs after digging up
Before putting the bulbs for storage, they need to be soaked for about half an hour in a solution of potassium permanganate (0.2 mg per 1 liter of water) or in phytosporin (a preferable option), this will protect them from pests and the development of diseases. After that, dry well and put in plastic or wooden boxes, you can in cardboard boxes, preferably so that the bulbs do not touch each other. It will be good if a layer of dry river sand is poured onto the bottom of the container. These measures will keep the bulbs intact and intact until the appointed time.
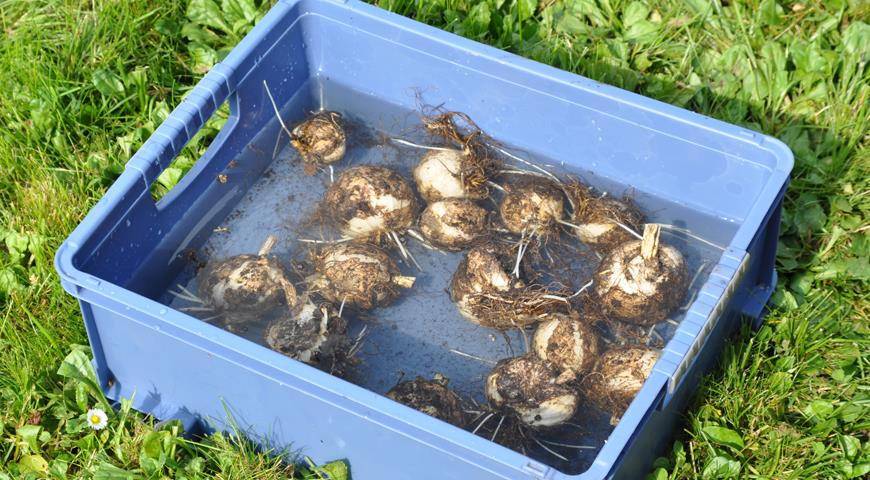
Soaking is an important step in storage
That's it, the work on harvesting the bulbs for storage is completed. Periodically, it is worth reviewing them for the presence of rot and, if found, cut off the rotten places and treat with an iodine solution.
If for some reason it becomes necessary to preserve the planting material until spring (for example, there is no way to plant it in the fall), then the bulbs need to be stored differently. Place them in a container with a damp peat mixture and put them in a cool place. Small dishes can also be placed in the refrigerator.
When to plant hazel grouses
The end of the summer - the beginning of the autumn season is the best time for planting hazel grouses. As already mentioned, they can be transplanted immediately after digging, in which case the bulbs do not need to be dried, it is better to plant them without delay. The plant itself will tell you when it's time to plant it in the ground. By about the end of August, roots and green shoots begin to appear. Large bulbs have not one but two shoots.
New shoots are a signal that it's time to plant
Do not delay the planting time, otherwise the roots will grow too much, and this will significantly complicate the process, since they must be carefully straightened, avoiding sharp bends and creases. The correct time for disembarkation is the end of August - mid-September, the exact dates depend on the climatic conditions of the region. The farther north the growing region, the earlier you need to start planting work.
The landing site should be prepared in advance, about 10-14 days in advance. Grouse grows well in sunny, open areas or in light shade, such as from the foliage of trees. It is worth avoiding places where there is a possibility of stagnant water, this can lead to rotting of the bulbs. It is also necessary to provide protection from wind and draft, as it can break the tall thin stems of the plant. Ideal options are by the fence, by the wall of the house or by a summer gazebo.
The soil in the garden bed prepared for planting must be dug up, weeds removed and fertilized. The hazel grouse should be planted to a depth of three times the diameter of the bulb (about 30 cm).The distance between the plants should be about 25-30 cm. It is advisable to place a drainage layer on the bottom of the holes. Top can be mulched with peat or sawdust. Before the onset of frost, the garden with the planted flowers must be covered. This will protect them from freezing in winters with little snow. In the spring, it is imperative to open the beds with young shoots in a timely manner.
Despite the fact that hazel grouse is an unpretentious plant, sometimes, even with proper care, it does not bloom. This may happen due to the fact that the bulbs were too old or, conversely, young (children), as well as due to an excess or lack of fertilizers (rather the second option) or too deep (too shallow) planting. Overly active loosening of the soil can also become destructive, as a result of which the root system, which is very close to the soil surface, can be damaged.
The imperial hazel grouse is an unpretentious bulbous plant that blooms in early spring. Its bulbs are preferably dug up annually in June. Store planting material at high temperatures in a well-ventilated area. Due to their fragility, they must be handled as carefully and periodically as possible for rot and other diseases. The optimal time for planting in the ground is late August - early September. If you plant this plant in the garden, pest problems will be significantly reduced due to the specific smell of the culture.