Gloxinia from seeds at home - how and when to sow
Content:
Gloxinia is one of the most popular plants among flower growers. Love for him is due to a very beautiful and unusual flowering. The flower reproduces mainly vegetatively, but you can try to grow seedlings from seeds at home.
Growing gloxinia from seeds at home
The first stage in growing gloxinia from seeds is to obtain planting material. Unfortunately, this is not so easy to do. There are many nuances to consider in order to grow healthy seedlings.
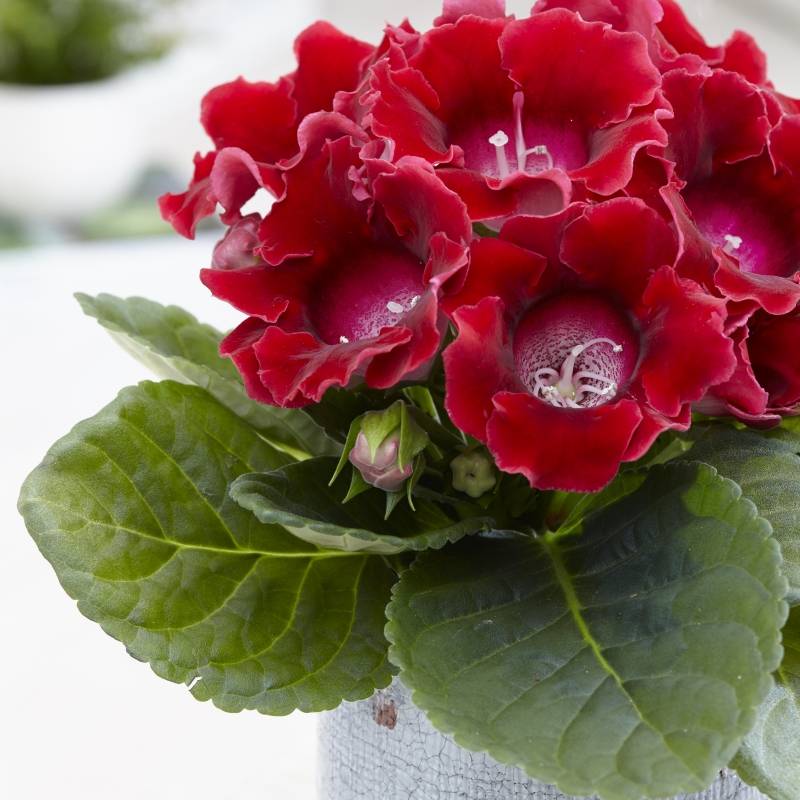
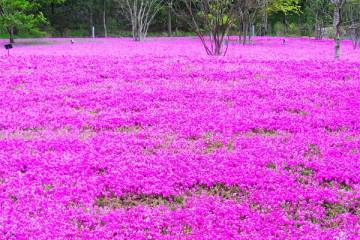
Gloxinia
How to get seeds
The easiest way is to purchase already harvested gloxinia seeds at a flower shop. Their cost will be small. But if the purpose of breeding a flower is to obtain new hybrids, you will have to go all the way: from pollination to the collection of planting material. Thanks to self-pollination, you can get varieties with an unusual appearance of inflorescences.
The answer to the question of how to get gloxinia seeds at home is very simple. But you have to be patient. First, transfer pollen from one flower to the pistil of another. After a few weeks, the corolla will wither, and a box with seeds will appear inside. The development and maturation of seeds takes from 6 to 9 weeks.
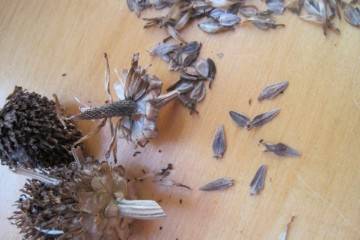
Gloxinia seeds are brown, pointed-oval in shape.
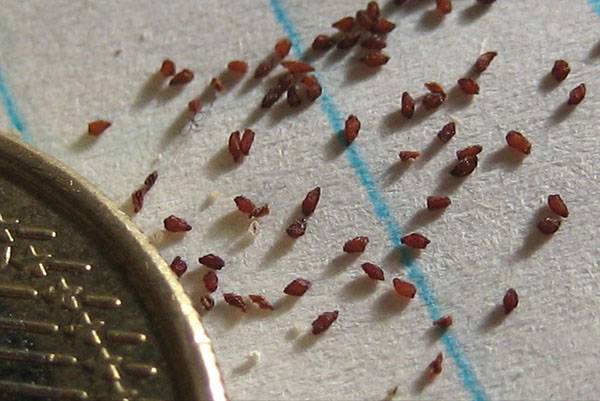
What seeds look like
Collection and timing of sowing gloxinia seeds
The seeds are harvested after the boll is completely dry and brown. The best time for sowing is early February.
Step-by-step instructions for growing gloxinia from seeds
Gloxinia from seeds at home grows no worse than adult plants that are sold in florist shops. But one of the main problems is that not all seeds usually germinate.
How to prepare the soil for planting
The first thing to do is to pick up the soil. Seeds can be sown in a ready-made soil mixture, or you can prepare it yourself.
The correct primer for gloxinia:
- land (best if it is collected from a site under a birch or pine);
- peat soil;
- shallow drainage (expanded clay or small pebbles are suitable)
Mix all ingredients to get a homogeneous mass. Fill the drainage to the bottom of the container, and then backfill with soil. Before planting the planting material, the soil is calcined in a microwave or oven for 1 hour. Thanks to this measure, all harmful microorganisms will be destroyed. Instead of the usual substrate, seedlings can be grown in peat tablets.
Planting procedure step by step
The most critical part of breeding gloxinia at home is sowing seeds. Before the gloxinia is planted with seeds, the soil is sprayed with a spray bottle. It should be slightly damp.

Sowing seeds
Then seeds are scattered on the surface. You can sprinkle them with a thin layer of soil. The main condition is that the planting material must not be buried.
The glass should be removed regularly to allow the soil to breathe.If this is not done, the soil will begin to mold, and then nothing will surely come up. As it dries, the soil is watered with warm, settled water. When the first sprouts appear, the glass is immediately removed. If it is not removed and the container is left in the sun, the sprouts will burn and die immediately.
Sprouts should appear 14-90 days after sowing. If more than three months have passed, and the seeds have not hatched yet, then the planting material has been spoiled, and nothing will sprout.
Watering rules and humidity
When growing gloxinia at home, special attention should be paid to moisture and watering. Frequent overdrying of the soil, as well as its constant waterlogging, negatively affects the seedlings. She either may not rise at all, or will quickly perish.
In order to properly grow seedlings, you must always monitor the soil. As soon as it has dried, you need to water it again, but at the same time do not allow waterlogging. It is enough that the top layer of the substrate is moistened.
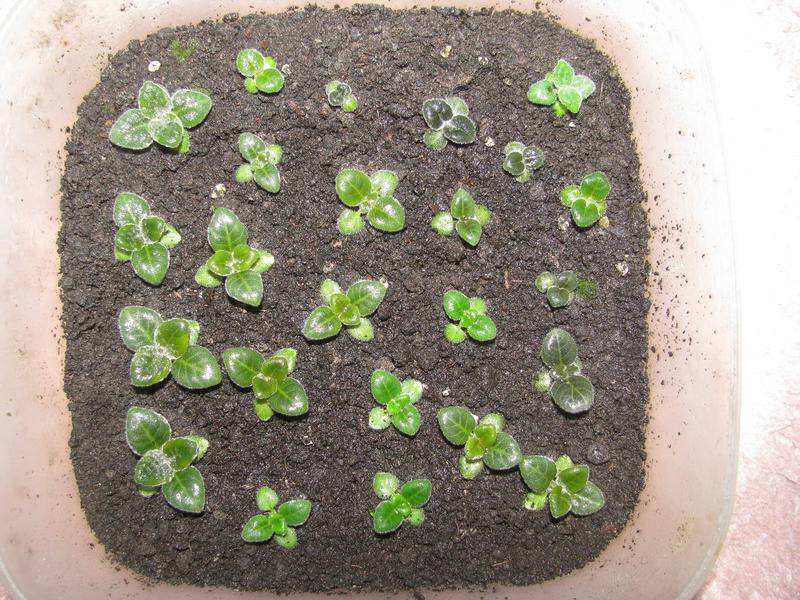
What seedlings look like
Top dressing and soil quality
In order for the flower to bloom, gloxinia seedlings are regularly fed. The first time feeding is applied after the third pick. You can fertilize with Kemira Lux. 1 tbsp. l. Dissolve fertilizers in 2 liters of warm water. Baikal-1M, Stimovit, Energen preparations can also be used as top dressing.
It is not necessary to feed the seedlings until the last pick, since fresh nutrient soil is used for transplanting.
Gloxinia is picky about the composition and quality of the soil. For planting, loose, oxygenated soil is best suited. It should also be sufficiently breathable. The plant prefers nutrient-rich soils.
Particular attention should be paid to acidity. Optimum values are 5.5 - 6.5 pH. If the acidity level is higher, the plant will die.
Seedling care
Seedlings definitely need quality care. This will help her grow stronger and get sick less often. Taking care of these plants is not difficult.
Seedlings need a lot of light for normal growth. If the spring is cloudy, the seedlings will experience a lack of sunlight and grow poorly. In this case, you need to install additional lighting and turn it on after lunch until evening.
Do not put containers with seedlings in a draft. When airing, the pots should be removed to a warm place. It is especially dangerous to leave plants in a draft after watering. Cold air and moisture can cause them to die.
Transplanting gloxinia in the spring
Before replanting gloxinia to a permanent place, you need to make several picks. This is necessary for the seedlings to develop normally.
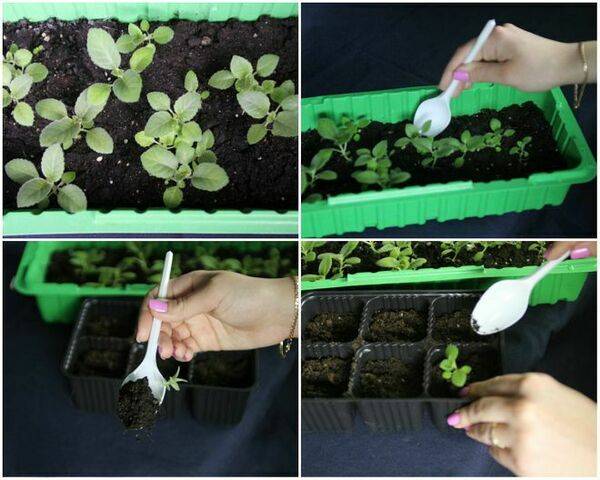
Dive into the ground
The pick is carried out in several stages:
- The first time the seedlings are transplanted a month after the emergence of shoots. At this stage, the seedlings are planted in several pieces in new pots. They are carefully dug up with a spoon and planted together with the soil. Then the soil is sprayed with water.
- The second time the seedlings are transplanted when it reaches 2 cm. At this stage, each bush is planted separately.
- The third transplant is carried out to a permanent place.
Mature shrubs also need regular replantations, which are usually carried out in the spring. It is best to do this in the second decade of February or early March.
Transplant process:
- Remove the roots from the pot and rinse them in water.
- If there are damaged or rotten parts of the tubers, they must be trimmed.
- Plant in a pot of new soil and dig in the plant.
At the end of planting, pour plenty of warm water.
Growing gloxinia from seeds at home is not easy, but very realistic. Considering all the nuances, you can grow healthy seedlings.